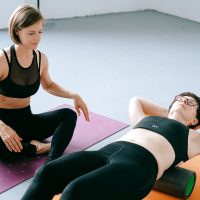
Cardio yoga is a popular style of exercise that combines yoga with cardiovascular, or cardio, exercises.
It has become increasingly popular among those who enjoy the relaxation benefits of yoga but demand more intensity.
This article explains everything you need to know about cardio yoga, including its benefits, specific workouts, and how it compares with other forms of cardio.
What is cardio yoga?
Rooted in Indian philosophy, yoga focus on poses, breathing techniques, and meditation practices to enhance consciousness and relieve anxiety
The practice has become increasingly popular throughout the world as a means to relieve stress, improve sleep, boost mental and emotional health, and relieve general low back and neck pain
While there are many types of yoga, Hatha yoga is the most commonly practiced, referring to any type of yoga that teaches physical postures
Most yoga classes — ashtanga, vinyasa, and power yoga — are hatha yoga.
While these types of yoga differ in the series, movement, and pace of the physical postures, they generally aren’t thought of as cardio or aerobic exercise
This is because they focus on breathing techniques, body flow, and postures, rather than dynamic movements that ramp up the intensity and elevate your heart rate.
Conversely, cardio yoga workouts involve performing yoga-inspired movements at a quicker pace and with continuous flow to engage more muscles and challenge your cardiovascular, or circulatory, system.
Specific cardio yoga workouts
Because there’s not an accepted definition of cardio yoga, instructors may mix in their own favorite movements and movement sequences.
While yoga is generally safe, make sure you’re on a flat surface and don’t have any conditions that may interfere with balance, such as neuropathy or orthopedic-related limitations
Here are a few moderate-intensity cardio yoga workouts to try that work all your major muscle groups, including your arms, chest, back, and legs
Surya Namaskar (Sun Salutation)
Surya Namaskar, commonly known as the Sun Salutation, is a series of postures performed in a sequence
Here is the sequence:
- Samasthiti. Start standing up straight with your feet together and weight evenly distributed. Your shoulders should be rolled back and your hands should be hanging by your side with your chin parallel to the ground.
- Urdhva hastasana. Inhale and bend your knees slightly, raising your arms over your head. Bring your palms together and look at your thumbs.
- Uttanasana. Exhale and straighten your legs. Bend forward from the hips and bring your hands down. Relax your neck.
- Urdvah uttanasana. Inhale and lengthen your spine, looking forward and opening your shoulders.
- Chaturanga dandasana. Exhale and jump or step your feet back. Bend your elbows and keep them tucked into your sides. Lower your body. You may either keep your knees off the floor, or modify the exercise by bringing your knees to the ground.
- Urdhva mukha svanasana. Inhale and point your toes away from your body. Lift your chest while your knees stay off the ground. Open your shoulders and look up to the sky.
- Adho mukha svanasana. Exhale and tuck your toes under, lifting your hips and bringing your shoulders down. Look at your navel. You may wish to stay in this position for up to five deep breaths.
- Urdhva uttanasana. Inhale and jump or step your feet together between your hands, lengthen the spine and look to the front while opening your shoulders (same as step 4).
- Uttanasana. Exhale and lower the crown of your head toward the ground and relax your neck (same as step 3).
- Urdhva hastasana. Inhale and bend your knees, raising your arms over your head and bringing your palms together while looking at your thumbs (same as step 2).
- Samasthiti. Exhale and straighten your legs, bringing your arms to your sides (same as step 1).
Complete this sequence at a relatively quick pace and repeat it for 20 minutes with no rest in between to keep your heart rate elevated.
Other movements
Here are other movements that you can do as part of a sequence:
- Child’s pose pushup. Starting in a kneeling plank position, perform a kneeling pushup then sit back onto your heels with your arms extended in front (child’s pose). Bring your body forward into the kneeling plank position and repeat.
- Leg lift pigeon sequence. Starting in plank pose, slightly lift your hips as you raise your left leg toward the ceiling. Slowly pull the left leg back down and through, tucking your knee in toward your chest. Lift your left leg again toward the ceiling, and this time as you pull your left knee through, allow the outer portion of your left leg to rest on the floor as you lower your left glute down. Return to the starting position and repeat with your right let.
- Walk downs. Starting from a standing position, bend at the hips and walk yourself down to a plank position. Push yourself into downward facing dog by pushing your hips to the sky. Hold this position for 1–2 seconds. Slowly walk yourself back, maintaining hand contact with the floor. Return to the standing position and repeat.
Perform each movement 10–15 times before moving onto the next exercise.
You can separate these movements with 30-second activities like jumping jacks, air squats, and stationary lunges to keep your body moving and heart rate elevated.


